If you have a 2wd, I would highly suggest lifting the front end and putting it on jackstands. It's a little tight under my 2wd vs my 4wd. I would suggest putting the front on stands anyway so your transmission pan is tilted aft, and you know where the fluid is going to come out when you loosen the pan.
I took the truck for a drive to get the tranny fluid warm so it would drain out better for me first. Once the front end was up, I set up a few pig mats and my oil drain pan under the tranny pan. Loosen the 1/2" pan bolts and gently pull down on the after end of the pan. I loosened the after ones more than the forward ones so it could til even more back. After it didn't drain anymore, I removed all bolts except 2 that were diagonal from each other. I then pressed the pan back in place with one gloved hand while I removed the other two bolts. I then carefully lowered the 3/4 full pan to the floor, and then drained it out.
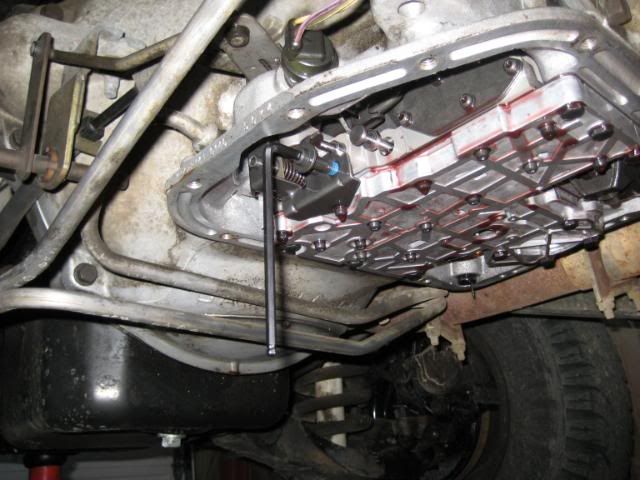
Remove the filter with the 3 long allen head screws. Take note how it's orientated along with the aluminum spacer. You can figure it out, but it's much easier if you take note of it now, the hole on the back of the filter MUST line up with the hole in the spacer upon re assembly.
FIRST, lets adjust the bands. You will need a small torque wrench that can dial in 72 inch pounds, OR 6 ft-lb. They are kind of expensive but you can use them for all sorts of things that we usually just say "good n' tight will work". I'm not sure how critical this is, I've read some transmission guru's do it by hand sometimes, but I am FAR from a transmission guru!
Anyway, you will also need a 5/16" 8 point socket...
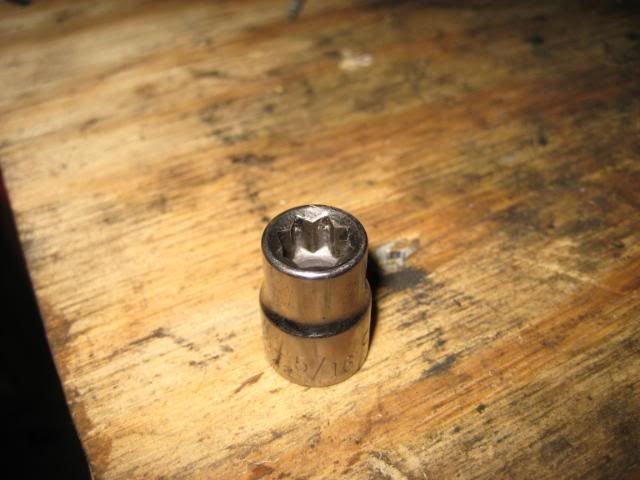
The band adjuster bolts have a rounded, square heads. I couldn't get any SAE or SI 12 point sockets to work since the edges of the head are slightly rounded. Luckily I had 5- 8 point sockets that came with my Craftsman tool kit that I've never used in 7 years until now.
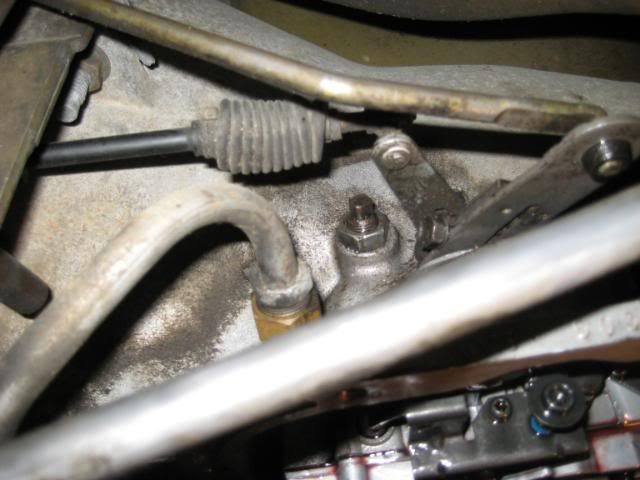
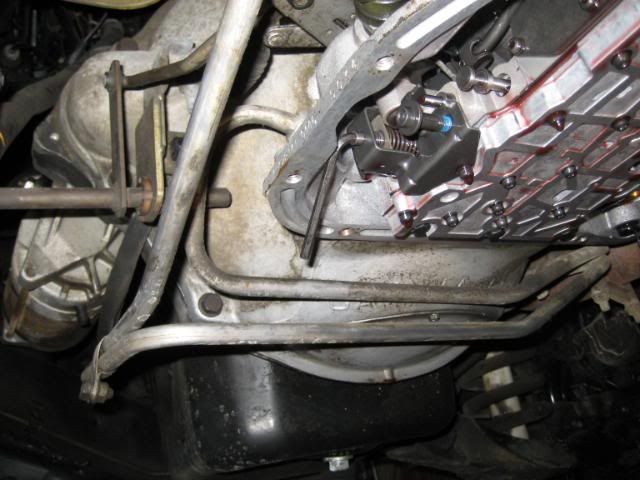
This is the Front (kickdown) band adjustment, the square head screw with the 3/4" locknut. This is on the driver side. Left is forward, right is aft. That cable with the rubber boot is the kickdown cable. So if you can't find this band adjuster, just follow the cable down and you'll find it. FYI, the Neutral Safety Switch (NSS) is just to the right behind that transmission cooler line in the middle of the picture. It has a few wires sticking out of it...
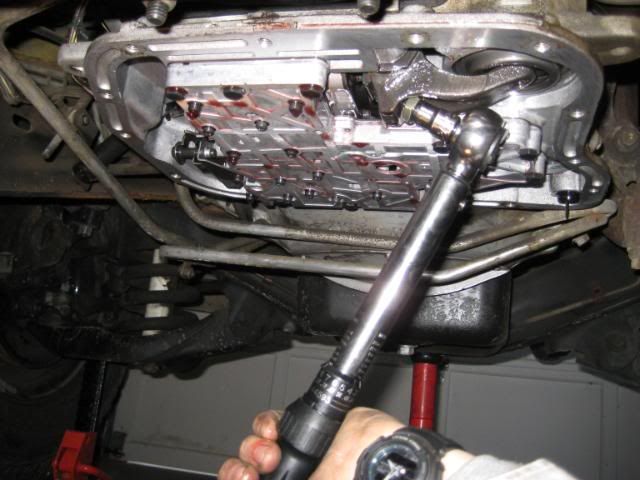
Loosen the band adjustment screw lock nut 4-5 turns. Make sure band adjustment screw turns easily. Tighten the band adjustment screw to 72 inch-pounds, then back it off 2 1/2 turns. Hold the adjustment screw in place and tighten the lock nut back up. It's difficult to hold this and get the locknut tight without removing some linkage. I used a swiveling head 3/4" ratchet wrench and was able to do it. I held the adjuster with a socket and extensions while the ratchet I was using was in OFF (CCW) position to hold the screw in place.
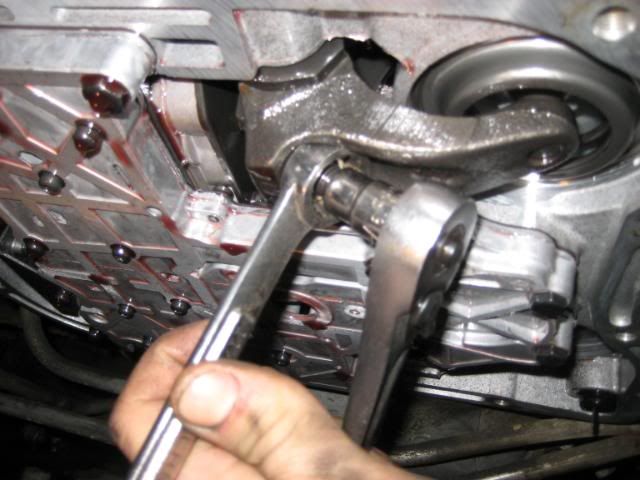
Now the Rear Band adjustment. Loosen the band adjustment screw lock nut 5-6 turns and make sure the band adjustment screw moves freely. Tighten the adjusting screw also to 72 inch-pounds, but only back of 2 turns this time...
Hold the adjustment screw in place same as before, and tighten the lock nut. This one is far easier to do...
There, that was pretty simple! Now, we can monkey with the line pressure and shift points a little more if your kick down cable can't get all the adjustment you desire. I can see this adjustment being VERY good for 3200 rpm spring installs since it will help delay low throttle shifting without screwing up your WOT shift points via the kickdown cable...
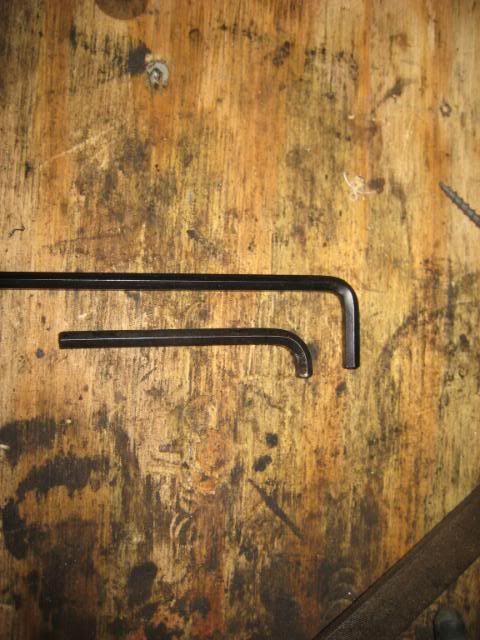
I read not to adjust this more than 2 full turns CW, this is a 3/6" allen wrench. I only did 1 full turn and felt it helped a bit, but I also increased line pressure so I'm not sure which had better benefits...

Next you'll need to modify a 3/16" allen wrench. I used a cheapy kicking around in my tool box, not my nice, ball ended one...
Now, this will adjust your line pressure. This is good if you turned up your engine some, it will give a little more pressure on the clutch pack I believe. You should test line pressure from the testing ports and adjust it to a certain pressure, and only adjust so much beyond that too. I was lazy. I was told I could increase pressure 5 or 6 psi extra no matter what. Since I have a 21 year old transmission, my line pressure is probably a little lower than stock anyway.
To adjust line pressure, you need to turn this screw CCW. Every turn is about 2 1/2 - 3psi of line pressure. I gave it 2 full turns...
Now I'm done. I installed my new transmission filter (that's for another thread), and reused the old pan gasket because it was a soft rubber and my new one from NAPA was cork . Don't over tighten the pan cause you are screwing into Aluminum. I think torque specs are only 13ft-lbs or something like that (good opportunity to use that expensive fancy torque wrench you just bought again!). Refill your tranny and check you fluid level IN NEUTRAL, not park. I always checked in park, and was running about 2 qts low because of this!
I warmed the truck up and adjusted my kickdown cable off a little so my WOT shifting didn't require a lift anymore. MAN, this tranny feels MUCH nicer now! At 55mph climbing a hill by my house I no longer have the engine climb to 2000 or 2100rpm. It stays at 1800-1900 or so. Burnouts are way too easy now, I definitely am VERY happy with these adjustments!!! I hope others can benefit from this as well. Happy Dieseling!
-Luke


