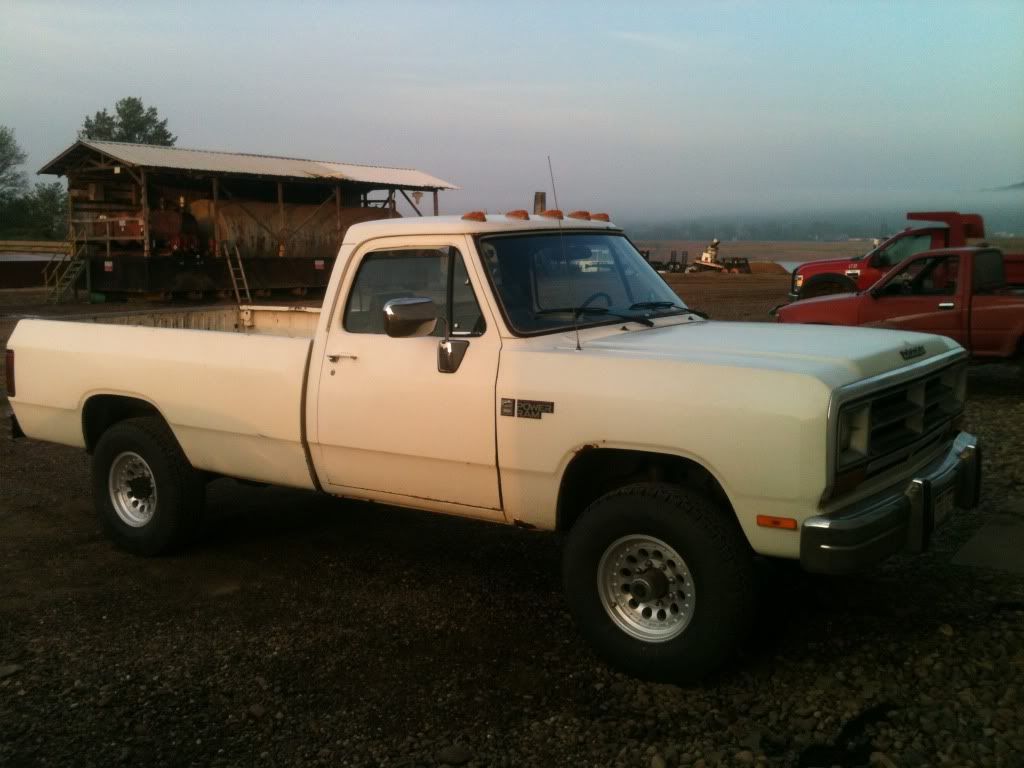
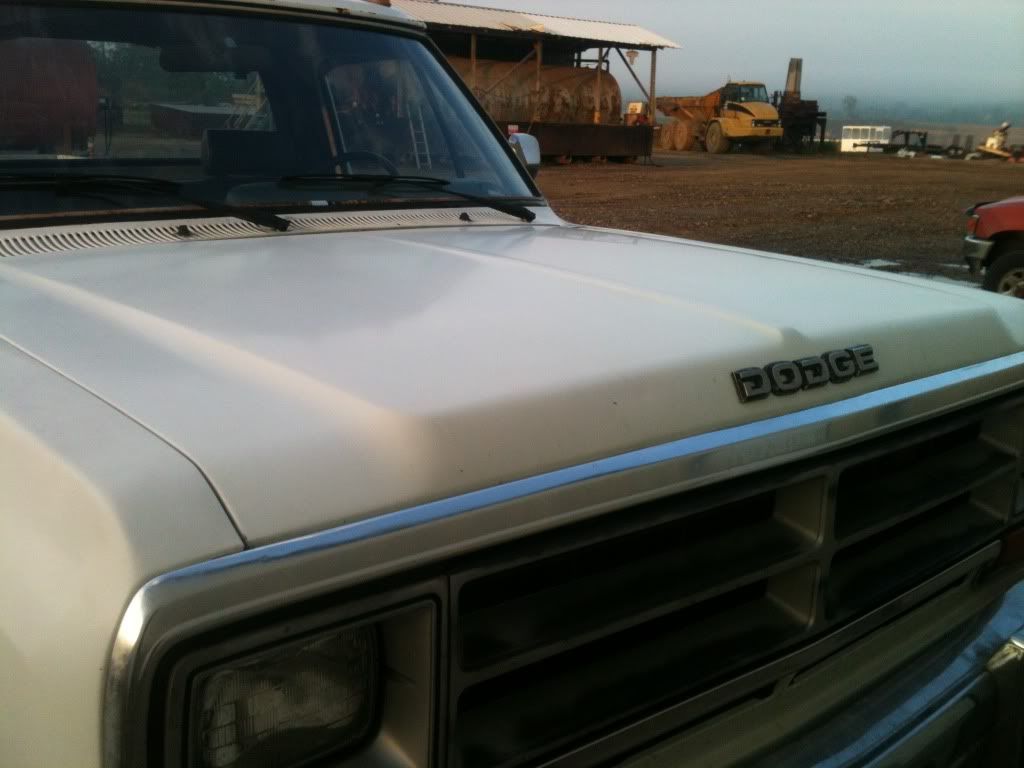
'90 W250--'89/91/92 Ramcharger

How to make it go fast

Moderators: Greenleaf, KTA, BC847, Richie O

Re: Build Thread - Chapter 6: Screw fixing it, I'm changing it!

Postby AHineman » Tue May 01, 2012 6:30 pm

TheTowingCowboy wrote:AMEN BROTHER RUBBER!


Levi might rub your brother, but not me. :P
Andrew

Owner of two old 1stgens and not much else.
AHineman
14mm rotor
 
Posts: 1364
Joined: Tue Aug 11, 2009 7:15 pm
Location: Crown City, Ohio

Re: Build Thread - Chapter 6: Screw fixing it, I'm changing it!

Postby oldestof11 » Tue May 01, 2012 6:58 pm

:shock:

Wow... This went downhill in CompD style...
Jon
93 D250~ Mismatch of cheap parts, trying to look fast going slow
User avatar
oldestof11
14mm rotor
 
Posts: 4147
Joined: Tue Apr 24, 2007 4:46 pm
Location: Northern Illinois

Re: Build Thread - Chapter 6: Screw fixing it, I'm changing it!

Postby TheTowingCowboy » Tue May 01, 2012 7:47 pm

AHineman wrote:
TheTowingCowboy wrote:AMEN BROTHER RUBBER!


Levi might rub your brother, but not me. :P


Well me and Levi are saslohe buddies.. I am the buddy he's the saslohe. Lol. And come on you guys know your having fun!
User avatar
TheTowingCowboy
fuel screw!!!!
 
Posts: 109
Joined: Sat Apr 21, 2012 7:34 pm
Top

Re: Build Thread - Chapter 6: Screw fixing it, I'm changing it!

Postby Tacoclaw » Wed May 02, 2012 5:54 am

So this is what happens when I don't update this thread with actual info about my truck, huh?
1990 W250 4x4
Rattles, growls, whistles, and whines.
User avatar
Tacoclaw
14mm rotor
 
Posts: 4120
Joined: Wed Mar 11, 2009 7:50 am
Location: Cheshire, OH
Top

Re: Build Thread - Chapter 6: Screw fixing it, I'm changing it!

Postby ahale2772 » Wed May 02, 2012 7:35 am

Middle coolers all up in this joint :lol:
84 CCLB W350 project
94' W350 Dually, Diesel, Auto 1080HP/1980FTlbs
User avatar
ahale2772
14mm rotor
 
Posts: 2353
Joined: Tue Jul 21, 2009 9:43 am
Location: massachusetts
Top

Re: Build Thread - Chapter 6: Screw fixing it, I'm changing it!

Postby Tacoclaw » Wed May 02, 2012 8:12 am

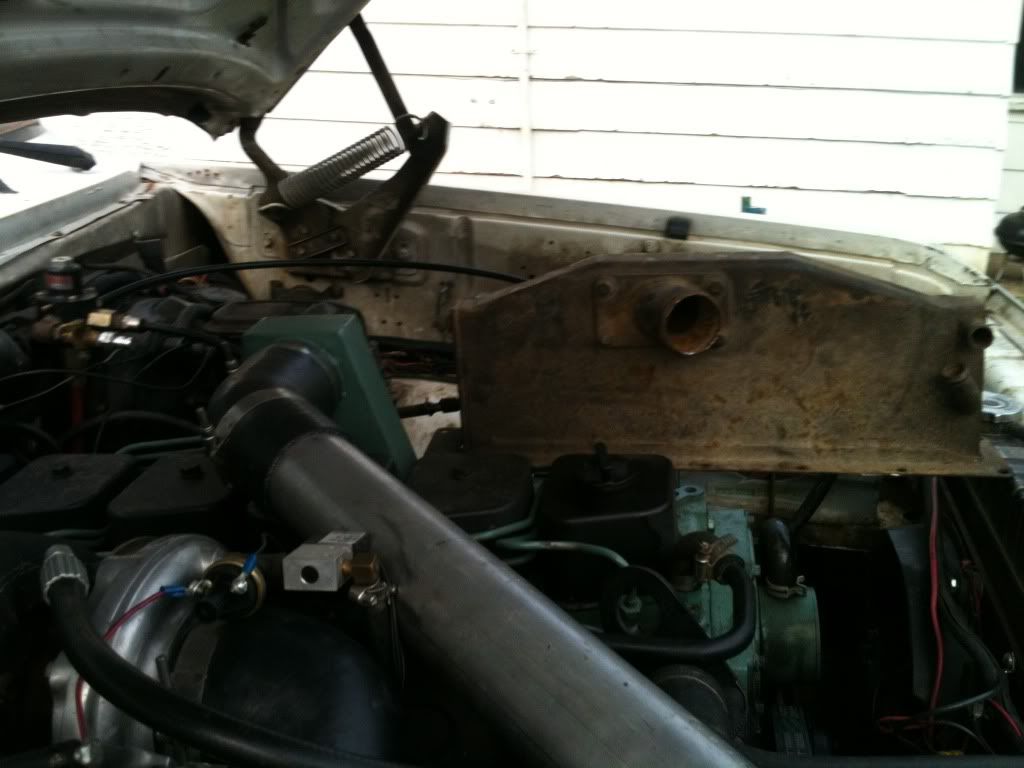
In honor of its new title change, here's a pic of my glorious, new(to me) middlecooler dwarfing the pathetic old cowbell:
Image
1990 W250 4x4
Rattles, growls, whistles, and whines.
User avatar
Tacoclaw
14mm rotor
 
Posts: 4120
Joined: Wed Mar 11, 2009 7:50 am
Location: Cheshire, OH
Top

Re: Build Thread - Chapter 6: Screw fixing it, I'm changing it!

Postby PToombs » Wed May 02, 2012 5:03 pm

That's not a middlecooler! That's an aftercooler, and a big SOB too! :shock: Are you going to pull the inlet and biggie size it to your pipe size?
pete

Just enough power to break everything behind the crankshaft.
User avatar
PToombs
14mm rotor
 
Posts: 11369
Joined: Sun Jan 07, 2007 6:13 pm
Location: Syracuse NY. Snow central!
Top

Re: Build Thread - Chapter 6: Screw fixing it, I'm changing it!

Postby Tacoclaw » Wed May 02, 2012 5:23 pm

Already on it. 8)

Squeezed me a piece of 3" pipe (easy, Hineman) in the vice, and it fit perfectly between the bolts. Unfortunately, I'm not sure what size of an outlet I'm going to be able to get out of an S300 housing, so I'm going to wait until I can find that out. I'll just keep it all the same size so I don't have to deal with reducers and whatnot.

Also, I gave the eyesore a bath today. I was told by my body-shop buddy that "ultra concentrated" Dawn was bad for car paint, but I had finally had it with the handprints and grease stains all around my hood and front fenders. I went out with an arsenal of cleaning supplies, from Comet to non-concentrate Dawn, to get them off there. I just happened to spot a Mr. Clean magic eraser the ex left under my sink, so I grabbed it too.

Just for kicks I put straight Dawn on the grease and rubbed it with the eraser while I was filling the bucket. It decimated the handprints. I don't mean it dulled them down, I mean they're not there anymore. These things had been on there for years. I don't know how bad those Magic Erasers are for a decent paintjob, but I know I'll be using them to wash my entire truck from now on. I went through 1 eraser per body panel, but holy crap can those things clean. :twisted:
1990 W250 4x4
Rattles, growls, whistles, and whines.
User avatar
Tacoclaw
14mm rotor
 
Posts: 4120
Joined: Wed Mar 11, 2009 7:50 am
Location: Cheshire, OH
Top

Re: Build Thread - Chapter 6: Screw fixing it, I'm changing it!

Postby PToombs » Wed May 02, 2012 5:35 pm

Don't erase it too much or you won't be able to find the truck! :lol:
pete

Just enough power to break everything behind the crankshaft.
User avatar
PToombs
14mm rotor
 
Posts: 11369
Joined: Sun Jan 07, 2007 6:13 pm
Location: Syracuse NY. Snow central!
Top

Re: Build Thread - Chapter 6: Screw fixing it, I'm changing it!

Postby dazedandconfused » Wed May 02, 2012 5:37 pm

Well where is the pics?
Big Andy
1983 Dodge D150 that has been repowered with a 93 Cummins/518 running gear AKA The Ugly Duck! I would much rather build them then buy them.[
User avatar
dazedandconfused
14mm rotor
 
Posts: 6119
Joined: Thu Apr 05, 2007 6:25 pm
Location: Walton, Kentucky
Top

Re: Build Thread - Chapter 6: Screw fixing it, I'm changing it!

Postby Tacoclaw » Wed May 02, 2012 5:46 pm

My oil leaks act as a GPS and tracking device. 8)


Pics of my truck? It's just clean, it's still ugly. :P

I'll grab one when it's daylight tomorrow.
1990 W250 4x4
Rattles, growls, whistles, and whines.
User avatar
Tacoclaw
14mm rotor
 
Posts: 4120
Joined: Wed Mar 11, 2009 7:50 am
Location: Cheshire, OH
Top

Re: Build Thread - Chapter 6: Screw fixing it, I'm changing it!

Postby dazedandconfused » Wed May 02, 2012 5:57 pm

Yeah so we can document you do clean it
Big Andy
1983 Dodge D150 that has been repowered with a 93 Cummins/518 running gear AKA The Ugly Duck! I would much rather build them then buy them.[
User avatar
dazedandconfused
14mm rotor
 
Posts: 6119
Joined: Thu Apr 05, 2007 6:25 pm
Location: Walton, Kentucky
Top

Re: Build Thread - Chapter 6: Screw fixing it, I'm changing it!

Postby Tacoclaw » Wed May 02, 2012 5:59 pm

dazedandconfused wrote:Yeah so we can document you do clean it


:P
1990 W250 4x4
Rattles, growls, whistles, and whines.
User avatar
Tacoclaw
14mm rotor
 
Posts: 4120
Joined: Wed Mar 11, 2009 7:50 am
Location: Cheshire, OH
Top

Re: Build Thread - Chapter 6: Screw fixing it, I'm changing it!

Postby Tacoclaw » Wed May 02, 2012 6:26 pm

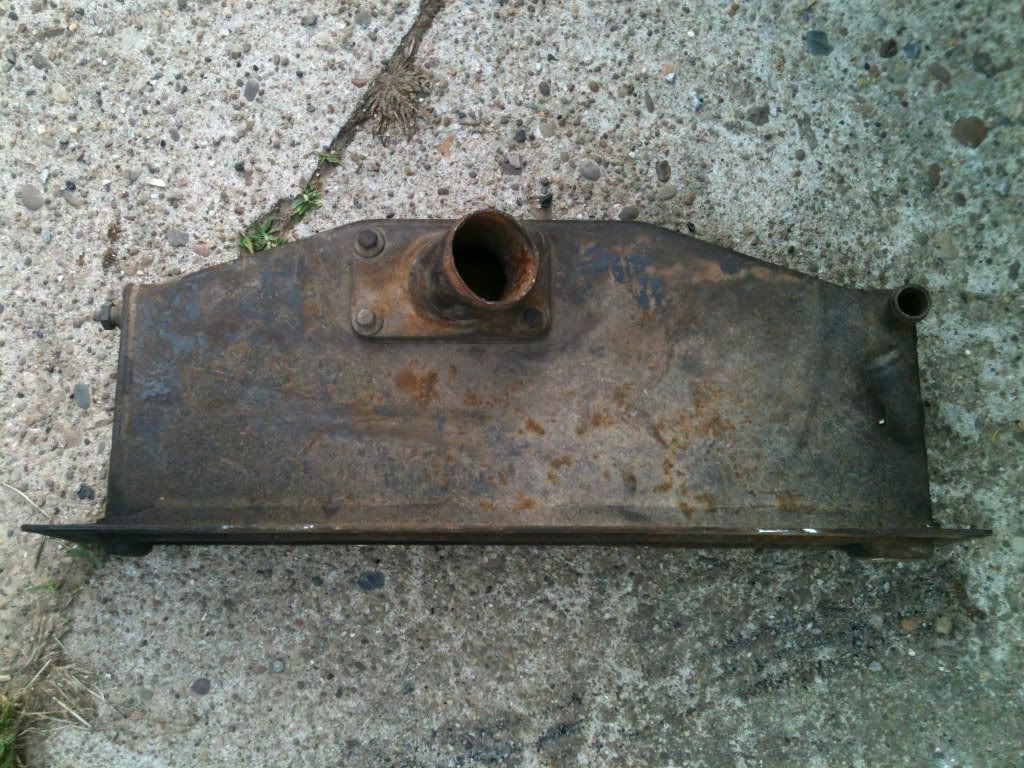
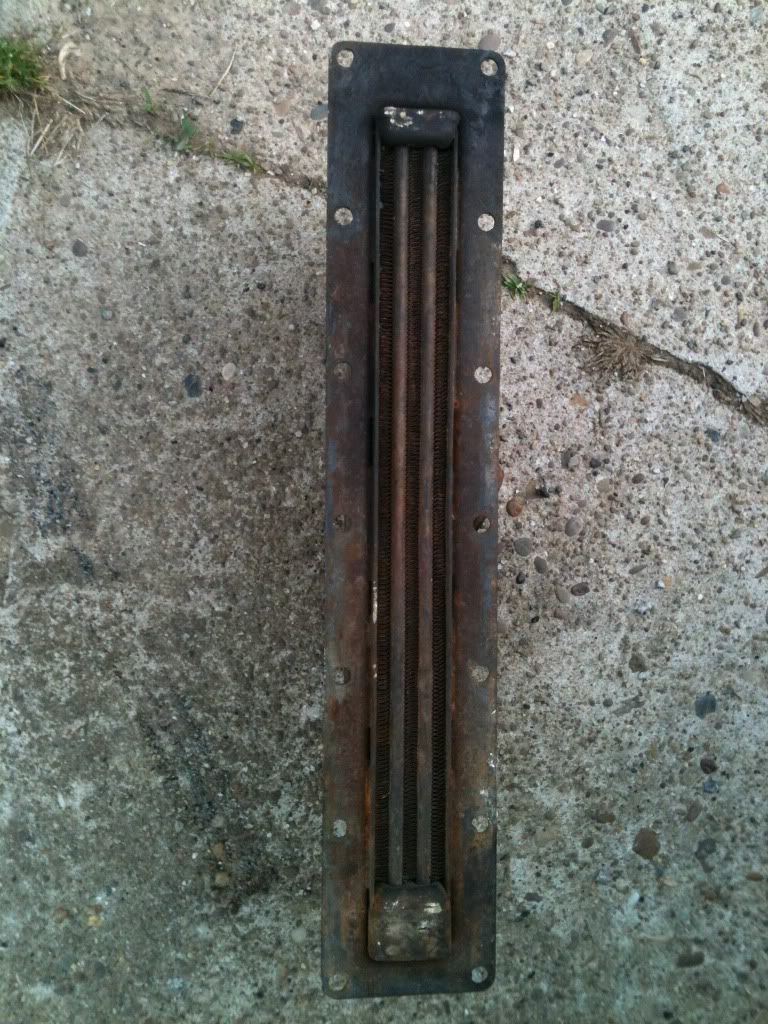
It may be gigantic, but it's crazy how skinny it is.

Image

Image
1990 W250 4x4
Rattles, growls, whistles, and whines.
User avatar
Tacoclaw
14mm rotor
 
Posts: 4120
Joined: Wed Mar 11, 2009 7:50 am
Location: Cheshire, OH
Top

Re: Build Thread - Chapter 6: Screw fixing it, I'm changing it!

Postby Tacoclaw » Thu May 03, 2012 4:53 am

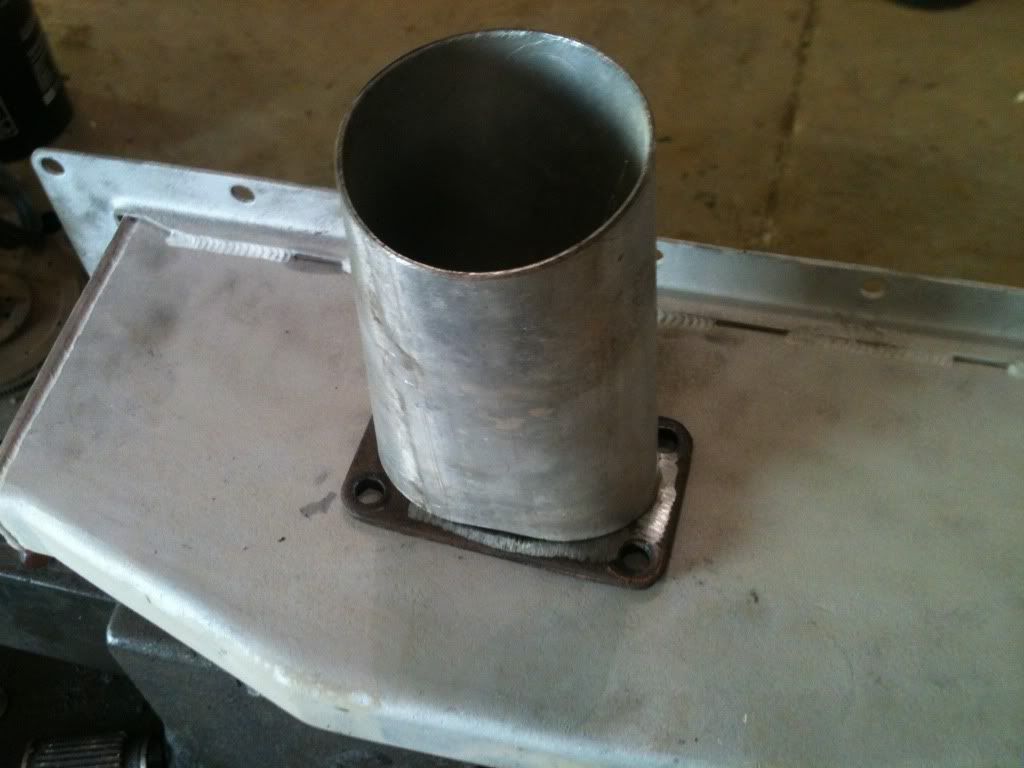
Here's the inlet with a piece of 3" squeezed to fit. I have a feeling that an S300 outlet is 2.5, so I doubt this will actually be needed:

Image

And here's a washed pic for Mr, Dazed's files:

Image

Image

It's not as clean now that it's dry, but one more pass should finish off the stragglers. 8)
1990 W250 4x4
Rattles, growls, whistles, and whines.
User avatar
Tacoclaw
14mm rotor
 
Posts: 4120
Joined: Wed Mar 11, 2009 7:50 am
Location: Cheshire, OH
Top

PreviousNext

Return to The good stuff

Who is online

Users browsing this forum: No registered users and 182 guests